Monday 20 December 2010

Make-up; where to start - Lesson 2 Part 3 (Eye-shadows)

So today we are at the final part of our make-up master class focusing on the eyes; for our final lesson on eyes, we will be considering eyeshadow.

Eye-shadow colours
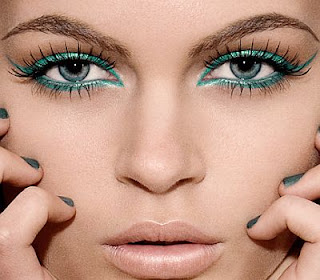
The most important thing when considering which eyeshadow to go for would be the most appropriate colour. For women with blue eyes, my pet peeve is to see them lines with blue eyeliners and eye-shadows. Using blue against blue eyes or indeed green against green eyes actually takes away from the colour of the eye and can make the natural eye colour appear more dull. 

For blue eyes, browns and pinks really bring out the blue in the eye and makes them look more dynamic and crystal. Green eyes on the other hand, are complemented by with hints of violets. Rich browns and mocha colours provide a subtle, everyday look for all eye colours, but mostly brown eyes. Browns eye-shadows can also be used to create a smouldering look when green and gold are also used. 


Eye-shadow application
Applying eyeshadow is very easy to do and very hard to do properly. It's easy to just slap on some colour over your eyelids but, it's harder to achieve different effects like the smouldering look etc. So, I thought it would be helpful to provide a visual demonstration of how to apply. And here at Tyger Eyes, we love Kim Kardashian and think her make-up looks amazing, so who better to provide us with a tutorial as to how to apply eyeshadow?

In these videos (provided courtesy of YouTube) Kim Kardashian and her make-up artist Stephen Moleski do a "smokey eyes" look. I picked this look as it is actually a good basis for applying all types of eyeshadow and can be used with all colours - even if you are not going for the dark/smouldering smokey eyes.


Our favourite eye-shadow brands
So, we have picked our three favourite eye-shadow brands:
  1. Bourjois - these are very reasonably priced and come in a variety of funky and dynamic colours. Unlike some cheaper make-up brands, Bourjois produce very high-quality and long lasting eye-shadows and even provide trio palettes for those who do want to try out the smokey eyes looks. Our verdict: An absolute bargain!
  2. MAC - the make-up artist's brand; and for a good reason. MAC produce high-quality eye-shadows in every shade conceivable and in lots of different types (from powders to gels) so there is definitely something for every body. Our verdict: The most popular make-up professional make-up brand for a reason.
  3. Dior - these eye-shadows are amazing and great for parties and evening looks. Many of the colours come with glitter and light reflecting particles so they are great to make your eyes dazzle. Definitely worth the slightly more expensive price tag. Our verdict: Trust Dior for real Tyger Eyes ;-)
So, that is it for the eyes! We hope you enjoyed it. Our next lesson will focus on lips so tune in again. Keep your comments, queries and questions coming and don't forget to sign up to our mailing list at www.tygereyes.com or follow us on twitter TygerEyes16 or Facebook for more information, tips, beauty updates and beauty offers.

Much love
Tyger xoxo

Thursday 16 December 2010

Addendum to Lesson 2 Part 2: How to apply mascara

As an addendum to yesterday's post, we have provided a guide to applying mascara for those who would like a tip or two. Many thanks to Lena Pertolo for directing us to her website (http://info-maquillage.fr/menu2/maquillage_techniques_mascara.php) which provides tips in French. As our blog is in English, we have translated the application guide for you lucky lucky people - it must be Christmas(!)


The final step
As we said yesterday, applying mascara should be the final step when putting on make-up. Mascara is applied to the lashes to beautify them and make them look more feminine. Applying mascara can enhance your lashes in different ways. Mascara can add volume and length to eyelashes makes your eyes appear brighter and more beautiful.

To ensure that your mascara looks natural and feminine (rather than clogged and over-applied), using the correct technique to apply mascara is very important and a good starting point is to use a colour which is complimentary to your skin-tone; if you have blond or red or light brown eyelashes lashes then go for brown mascara. If you have darker features however, black mascara is just fine. 


Application 
Before applying your mascara, ensure you have applied all other eye make-up and curled your eyelashes – which can make your eyes look larger and your lashes look longer.

Start by applying mascara to your upper lashes first. Apply the mascara from the back of your lashes first, in a downward motion and then to the front of your lashes upwards and from below. Use a small zigzag motion to prevent clogging mascara to your lashes. 

After this, use the tip of the mascara wand to brush your lower lashes, using a soft side to side technique. Be sure to keep your hand steady and try not to blink (or sneeze) while the mascara is still wet. After you have applied the mascara, comb your lashes with a lash comb to remove the excess of the stick left behind. 

Wait a minute before applying a second coat; this allows the first coat to dry and gives the second coat something to cling on to; two thin coats look more natural than one thick layer. Once you’ve made the second application, use a clean dry brush to separate your lashes, if required. 


Removing mascara 
Mascara must be removed carefully to avoid damaging the delicate skin around the eyes. When removing mascara eyes always avoid the colour from reaching the delicate area below the bottom lashes and close your eyes. Roll a cotton swab dipped in a cosmetic cleanser over the lashes, taking the mascara down onto the fabric. Repeat until all the mascara is gone. 

Thanks for joining us again! Please do go to our website www.tygereyes.com and sign up to our mailing list for free beauty offers and follow us on Twitter TygerEyes16 for more updates!

Much love 
Tyger xoxo

Wednesday 15 December 2010

Make-up; where to start - Lesson 2 Part 2 (Mascaras)

So, today, and as promised, we are going to continue talking about eye make-up. Having already covered eyeliners in Part 1 we will now look at mascara. You lucky things - all of this, just in time for Christmas!

Basically, if you don't know what mascara does then where have you been? There are different types of mascara that accentuate different aspects but, once you have put on your make-up (false lashes optional) then you really must put on a good mascara to really bring out your eyes and make them look more feminine.

My all-time favourite mascara was discontinued several years ago but, I don't think there is anything on the market that is as good as it was: Longtitude by L'Oreal. It was amazing and seemed to coat every lash individually. All my friends and I tried a multitude of different mascaras but this was always the best and it was relatively cheap. Then one day, out of nowhere, L'Oreal go and discontinue it; and, the real shame is none of their other offerings even come close to being how good this one was - but they try so we have rated our favourites!

Our Top 5
For a long long time now, the most popular mascara on the market has been Maybelline's Great Lash. I have short eyelashes and have tried literally every mascara on the market from boots own brand (not great) to Doir mascaras. Maybelline's Great Lash is really good and also comes in a waterproof version - I like the brush as it is quite petite so really good for getting at those shorter eyelashes and framing your eyes. I would say it is a staple type of mascara so worth having in your make-up bag but, my all time top 5 are as follows:

1. Chanel - Inimitable. This is without a doubt and hands down the best mascara on the market! It's brush is fabulous and quite densly packed which helps to avoid the problems of clumping and it comes off fairly easily. It is great for both volume and length yet still looks natural. If you are looking for an all-day/everyday mascara then this is the one for you.

2. Lancome - Hypnose Precious Cells. OK so, I am not sure how much I believe the claims that this mascara uses stem cell technology (what a great use of technology!) to make your eyelashes grow more quickly but there is no denying that it makes your eyelashes instantly look thicker. Definitely worth the price tag.

3. L'Oreal Paris - Volume Million Lashes. It is slightly cheaper than the other mascara's in the top 5 but it is great as it really does give a very dramatic look and gets you halfway towards the false lash look. Also, it is reasonably priced and comes in a waterproof version.

4. Shu Uemura - Ultimate Expression Mascara. This mascara is also on the expensive side but actually is great for those with slightly shorter lashes as it helps to give a curl on the end which can help make your lashes look longer. It is also reputed to be smudge-proof (hmmm) and the brush is densley packed so it really coats your lashes almost individually

5. Yves Saint Laurent - Volume Effect. It is amazing, gives an almost false lash effect and it is lightly perfumed so it smells great. I would recommend this for all types of eyelashes as it gives both great volume and helps to lengthen your lashes. It also comes off quite easily so you can avoid the whole panda eyes scenario the morning after. I recently stumbled upon a blackest black version of this mascara which I am in love with but is slightly harder to get off your eyelashes!

Mascara application
As a starting point, do not believe the magazine or TV adverts! You will never get lashes like that, well, not unless you also have some lash inserts or the magic of photoshopping to help you along.... Really though your primary concern should be the choice between: (1) if your eyelashes are short - a lengthening mascara; (2) if your eyelashes are long - a volumising mascara; and/or (3) whether you want a waterproof mascara.

Mascara should be applied after all the other eye make-up, eyeliner and false eyelashes have been applied. You should also apply it after curling your eyelashes as it can reach more of the lash that way and helps prevent you blackening your eyelash curler.

With the application, it should be fairly self explanatory but, you should always apply mascara in an upwards stroke on your lashes - from root to tip. I like to apply the mascara all over my lashes and then wait a minute or so before a re-application as this allows the first application to dry so you can build up the volume in your lashes. Also, when re-applying don't pump the brush up and down in the mascara bottle but sweep it around the sides, this prevents air and bacteria getting in and means that the mascara can last longer.

Generally, I go for blackest black mascara's but the colour of mascara you chose ultimately depends on your skin tone i.e. lighter skin tones should try more brown mascara (and lighter colours for eye-make-up).  You should always pick the best colour for you and, it is worth asking the make-up artists at make-up counters as they can advise.

Waterproof Mascaras
A male friend once asked me: why, if women are going to wear mascara, would they not pick a waterproof one? Believe it or not, I had to think about the answer but simply, the truth is, there is not always the choice. And also, some mascaras will differ in consistency between the waterproof and non-waterproof versions. I would generally go for the waterproof versions where they are of offer but, I don't bother to hunt them out.

So that is it for today. I hope you have enjoyed this; our mascara master class! Do post a question or comment should you have any. In the next lesson, we will discuss eyeshadows and link to our celebrity application video. Don't forget to follow us on Twitter TygerEyes16 or Facebook for more information, tips, prizes and the chance to get free treatments!

See you soon!
Tyger xoxo

Monday 13 December 2010

Make-up; where to start - Lesson 2 Part 1 (Eyeliners)

As promised, this is lesson 2 of our make-up master class and today we will be talking about eyes.  In the first of our eye-based lessons we will discuss eyeliners and continue another time with eyeshadows and mascaras.

I personally love love love eye make-up and think I probably focus too much on eyes above other aspects of make-up as I have large lips and too much colour on my lips can look over powering so I tend to stick with more neutral colours there.  However, with my eyes, I experiment with colours and love trying out new, dramatic and interesting styles.
When starting with eye make-up it is really important to have a base to put the eye make-up on to.  First things first you need to moisturise - this is not just a make-up thing but helps to nourish your skin.  It always astounds me when I meet people that don't moisturise but anyway - I'll save that for another post ;-)

After moisturising you may decide to go for a primer, foundation or powder, however, whatever your beauty and make-up regime and before you start with the eye make-up you need to make sure that you put a powder with a silicone base (see Lesson 1 for our powder recommendations). Although this sounds very scientific, it is not - any powder with a silicone base just goes into your natural facial creases and stops the make-up from creasing or bleeding. Another tip  for stopping make-up bleeding (Nisha) is to not rub your eyes...

For the powder base, I like to use a loose powder, brushed over the eyelids with a small powder brush. A tip I learnt from Kim Kardashian's make-up artist is to brush a little more loose powder under the eyes so that if the eyeshadow falls onto your cheeks - which it often does - you can easily brush it away.

Eyeliner
I am totally one of those people who cannot leave my house without wearing eyeliner. I absolutely love the stuff and get through a (UK) tonne of it every month. You can get lots of different types of eyeliner; whether it be liquid, gel, powder, pencil, kohl, pen and I think the look you are going for should be what dictates your choice of liner. But before I go on, I have a bug bear, I absolutely hate to see when people leave a gap between their lash line and the liner.  Unless this part of a retro 70s look, it just looks slapdash and if you have taken the time to put on your make-up, you may as well spend the extra 30 seconds getting it right, right? 

Eye pencils and kohl
Pencil and kohl eyeliners are the most popular kinds of eyeliner. I prefer Kohl as they give a dramatic colour and a softer more smudgable line, however, they are most likely to give you panda eyes so for work I tend to use a pencil which lines without the added drama.  My pencil recommendation are the colours in the Boots No. 7 pencil eyeliner range. They go on really softly but still give the required definition. Bourjois also make high-quality and reasonably priced eye make-up and fantastic party eyeliners. The Bourjois Douchrome range of eyeliners come in Noir emeraude and Noir bleute which actually look almost black but reflect shimmery emerald and blue, respectively. I love to wear these colours around the top and bottom of my eye line and with some black mascara to add a touch of je ne sais quoi to my look.

I think people make most mistakes with applying pencil eyeliners. The trick is to use a freshly sharpened pencil and make sure it lines the precise line along your lashes. I know this is terrible for wrinkles and I'm sure I will regret it one day but I usually gently stretch the (delicate) skin around at my eyes to make it easier to apply the liner. I even the lines out with a cotton bud dipped in a tiny bit of eye make-up remover just to finish things off.

When I wear kohl, I like to smudge the line slightly to blend it with any eyeshadow I am wearing. To do so I use MACs 208 eyeliner brush which can build up the line and help give a natural progression from the eyeliner to the eyeshadow.  My kohl pick is MAC's smoulder which only takes a light touch for a dramatic effect.

Liquid eyeliners
Liquid, liquid pen and gel eyeliners can give thinner and more precise lines, but can also be used to build up thicker and very dramatic looking eyeliner shapes and flicks. The problem is they can be quite tricky to use.  If you are a novice then I would suggest using a liquid pen like Ecuriture de Chanel to start with, but if you have the hands of a surgeon then liquid a good pot of liquid eyeliner such as Nars which is brilliant as it doesn't bleed, smudge or fade the whole day.

To apply a liquid eyeliner I would recommend having some cotton buds to hand and eye make-up remover. Take it in steps:

  1. As above, start with a foundation or powder with a silicone base.
  2. Liquid eyeliner should be applied along the roots of the upper lashes working up and out from the inner corners outwards. If you can’t draw in one smooth motion, try a succession of lines along the lashes and join them up. The line should be thicker at the outer corners of the eyes to make them look bigger.
  3. To create a flick at the outer corners of the eye beyond the outer corner of each eye take the eyeliner brush gently upwards - don't worry if the line is not exactly perfect you can always clean it up later.
  4. If you make any mistakes put some cleanser on a cotton bud to wipe the make-up away and even out the lines.
I never use a liquid eyeliner on the bottom lash line as it can look too unnatural but, if you are going for a 70s look then it is worth an experiment.


Gel eyeliners
Gel eyeliners are very similar to liquid eyeliners and can generally be applied in the same way. Gel eyeliners are slightly easier to put on as the consistency allows for easy blending and layering whether you want a thin barely visible line or a more dramatic Amy Winehouse look.  Bobbi Brown has an amazing range of gel eyeliners which come in a variety of colours which means that there is something for everyone from demure kittens and rock chicks. The only problem is that the brush provided by Bobbi Brown isn't that great so instead, I use MAC's 266 for a more precise line.

Powder eyeliners
Before even attempting to us a powder eyeliner you need a good liner brush.  MAC's 208 is perfect here as it has a thin and very shaply cut line.  As with other types of eyeliner the powder is meant to run along your lash line and unlike liquid eyeliners create a more natural look so can be used on the bottom lash line as well. My favourite powder eyeliner is MAC Carbon eyeshadow, however, any eyeshadow can be used as an eyeliner so, it is a good make-up choice for those every body as eyeshadow comes in every shade. The only problem with applying a powder eyeliner is that it can leave a dusting of powder on your face and as these powders tend to be darker shades, it can ruin any already applied make-up. To avoid this, I would recommend dipping the brush in the smallest amount of water first just so that it is slightly damp and makes the powder stick to the brush. This should make it easier and less messy to apply the powder along your lash line. With a good brush you can really build up the powder look and attempt some unique shapes.

In terms of ease of use and portability, there is no beating a pencil eyeliner but, what you choose to use is down to your preference and what you feel comfortable with. Regardless you shouldn't be afraid to experiment with colours and styles - even if you start in the privacy of your own home.

I hope you have enjoyed this lesson - come again soon for more tips. Don't forget to follow us on Twitter TygerEyes16 or Facebook for more information, tips and prizes!

Much love
Tyger xoxo

Wednesday 8 December 2010

MINX Nails

Have you heard MINX nails yet? I ask because they've taken the beauty industry by storm.

I caught my first glimpse of MINX nails a few months ago in one of my beauty magazines. Beyonce was wearing them in silver chrome and I was like, "WHERE can I get some of those?" They looked amazing.

Back then MINX were brand new, and many people hadn't heard of them, including most salons.

Now, they regularly appear in magazines, being worn by more and more celebrities. Rihanna, Beyonce and Lady Gaga are huge fans of the brand.

So what are MINX nail coverings?
Literally, they’re adhesive nail stickers available in a wide range of colours and patterns. All available at Tygereyes... The variety is what makes these the coolest nail art I've ever seen.

Here at Tygereyes we can even do custom made MINX coverings. If, for example, there's a particular print or pattern you love, we can send a sample to MINX to turn into your very own design. Pretty cool , huh?

Overall, I love them! Tons of people always  compliment me about them (I think they go with everything), and everyone has noticed.

MINX nails are a cool, fun way to express your personality, like fashion for your nails!!

So go on get MINXed! Just once and you'll be hooked ;-)

Thanks for visiting Tyger talk. Don't forget to follow us on Twitter TygerEyes16 or Facebook for more information, tips and prizes!

Much love
Hayley xoxo

Tuesday 30 November 2010

Perfect False Eyelashes ;-)

When you have naturally short eyelashes, using just an eyelash curler and mascara doesn’t always cut it. Enter false eyelashes, the perfect way to bring out your eyes and achieve a more dramatic look. Here are the top falsies we recommend at an affordable price.

The Daytime Set
During the day, you usually want to look more natural and conservative for school and/or work. Stick to straight and even lashes (avoid alternating lengths or crisscrossed styles), so you can still apply mascara to blend them with your natural lashes. You can also try individual lashes, which are easier to control and can be spaced out or condensed to create more of a natural or dramatic look, according to your preference. Individual flares can also be placed in the outer corner on top of any other falsies to make it look a little flirtier.

Glamorous Evening Lashes
To create a bolder, dramatic look for going out at night, I personally prefer Shu Uemura Smoky Layers Lashes, they really add Hollywood volume to your lash line. I also find the Shu Uemura adhesive amazing, it really does keep your eyelashes firmly in place all night.  Be careful though—if you are applying a dark eye shadow or lip colour, pick a set of false eyelashes that will complement, rather than steal attention away from the rest of your makeup.

How to apply false eyelashes
Before applying false eyelashes, determine what style or shape works best for your eyes. Strip lashes will most likely have to be cut shorter on the corners for a perfect fit. Some find individual lashes easier to apply and more natural looking. I think it depends on your own lashes and look you’re going for.
  1. Start by curling your own lashes and applying mascara as usual. Hold the lash with fingers or a tweezers and apply some lash glue along the entire strip, making sure not to use too little or too much of the product. Now STOP. The glue must dry a bit to a tacky texture before its placed. You will know its ready when it darkens a bit and looks almost dry.
  2. Now you can take the lash with tweezers or even your hand, tilt head up a bit and apply the lash right over your own lashes. Make sure to try and get it as close to the roots as possible. Curling your lashes and false lashes together (with very little pressure) works beautifully to join and blend the two. For added drama, apply more mascara and then separate any clumps if needed.
  3. Lining the top lids with a dark eyeliner really finishes the look and conceals any imperfections along the upper lash line ;-)

For fun and glamorous lashes try Shu Uemura and MAC. Another fave of mine and classic are Eylure which comes in tons of different styles.
Remember practice makes pretty! 

Thanks for visiting Tyger talk with Hayley. Don't forget to follow us on Twitter TygerEyes16 or Facebook for more information, tips and prizes! xoxo

Thursday 25 November 2010

Make-up; where to start - Lesson 1 Part 2 (Face)

As promised today we will look at foundation and powders, but before we continue we should clarify the order in which facial make up should be applied - that is:
1. Moisturiser  
2. Base/Primer
3. Foundation
4. Concealer
5. Powder.

My personal make-up regime is fairly light so it tends to be (1) Moisturiser, (2) Concealer (on rare occasions) and (3) Powder.  However, what you choose to use should directly correspond with how much coverage you feel you need and the look you are going for.

...laying the foundation...


Has anyone noticed that this sounds very much like what builders do?  Put the trowels away unless you are going for the drag queen look - and some people do (Christina Aguilera for example).  Anyway, as a starting point foundation is the make-up you put all over your face; primarily to even your whole skin tone out and allow the other (colour based make-up such as eyeshadow) to stay on longer. We think that the best foundations are liquid foundations as cream ones can be too heavy and as it goes all over your whole face it is very important to find out what works for you. Like a coat, your face is the first thing that people see so you should be willing to spend the money on a good foundation which matches your skin tone and would allow your skin to breathe. At Tyger Eyes, our all time favourite is Laura Mercier oil-free foundation.  It is really light and covers beautifully. Also, Lancome's Teint Miracle is great as it creates a bare skin perfection and allows your skin to breathe. Another foundation worth a mention is Giorgio Armani luminous silk foundation - it is oil free and like the title, it feels like silk on your face. We know Clinique is very popular but generally we think it tends to look ashy and really only suits those with blue (yes blue) undertones in their skin - these are (natural) blondes, some people from the Far East and some people from certain East African countries such as the Sudan and Somalia, so it doesn't make our faves list.


Although it is important to get the colour right when choosing a foundation, it is not always possible to get an exact match. So, if you ever need to pick between a slightly lighter or a slightly darker colour - always go for a lighter colour as this is easier to blend and is less likely to give you the look of a 19th century minstrel - race relations have come a long way so this is really not a good look anymore.

...finish with powder.
Powder is great!  It "sets" your make up i.e. helps keep it in place and it also absorbs a lot of the natural oils in the face and your foundation so that your face doesn't look too oily.   Powders come in all shapes and sizes but we prefer loose powders as they are easier to apply and give better coverage.  However, pressed powders are less messy and easier to transport (for later re-application), so it's all about what works for you.

Our favourite powder: we recently stumbled upon an amazing powder by a relatively unknown Australian company - Youngblood High Def Mineral Powder.  It is perfect for setting make-up and helps to create a flawless but light finish. However, if you can't get hold of this powder, Laura Mercier and Nars also make good powders which come in a range of colours

Powder/foundation combos
OK, so I am not fully convinced by powder/foundation combos as they are meant to give the full foundation coverage with a powder finish.  And although they give very good coverage, they can be a little too liquid and don't always give a matt finish.  This means you have to finish with another powder, defeating the point of using a combo.  On the plus side, they are a good starting point for people who don't like to wear make-up very often and don't want to go through the whole make-up process.  Also, they are easier/less messy to apply and easy to transport - so allow for easy re-application.  Our recommendations here would be MAC Studio Fix which can be applied with a good brush like MAC 134 and Chanel's Double Perfection Compact. 

This has been a long long lesson but, before signing off, we just want to address one of the questions we had emailed to us about using cheaper make-up ranges which may have a more diverse range of colours to match skin tone.  This is a dilemma as it is important to find a range that suits your skin but it is more important to make sure that the make-up is good for your skin and allows it to breath i.e. doesn't clog your pores which can encourage spots so in such cases we'd say try before you buy just to know how your skin would react to it and then go for the one you like best.  

We're loving the responses so keep them coming! Don't forget to follow us on Twitter TygerEyes16 or Facebook for more information, tips and prizes!

Much love
Tyger xoxo